Preface
Class Activation Mapping (CAM) is used to visualize the regions of interest in deep learning models, enhancing the interpretability of neural networks. Currently, Grad-CAM is commonly used for visualization. Grad-CAM calculates the activation map based on gradients, offering more flexibility than traditional CAM, and it does not require modifying the model structure.
Although computing Grad-CAM is not complex, following the principle of using existing libraries if possible, it is preferable to use ready-made libraries.
Simple Trial
Load Model and Pre-trained Weights
Here we use the Resnet50 model pre-trained on ImageNet provided by PyTorch. Note: Using the pre-trained model parameters also requires using their provided image preprocessing method.
from torchvision.models import resnet50, ResNet50_Weights

# Load ResNet model and pre-trained weights
weights = ResNet50_Weights.DEFAULT
model = resnet50(weights=weights)
model.eval()

preprocess = weights.transforms() # Image preprocessing method
Simple Image Input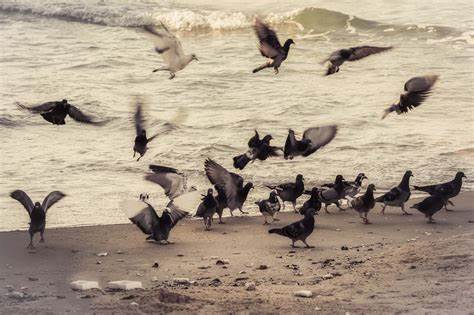
from PIL import Image

src = 'bird.jpg'
img = Image.open(src)
print(f'The Image size:{img.size}')
img_tensor = preprocess(img)

print(f'The shape of image preprocessed: {img_tensor.shape}')
Output
The Image size: (474, 315)
The shape of image preprocessed: torch.Size([3, 224, 224])
Calculate Grad-CAM
from pytorch_grad_cam import GradCAM

grad_cam = GradCAM(model=model, target_layers=[model.layer4[-1]])
cam = grad_cam(input_tensor=img_tensor.unsqueeze(0)) # Input Shape: B x C x H x W

print(f'Cam.shape: {cam.shape}')

print(f'Cam.max: {cam.max()}, Cam.min: {cam.min()}')
Output
Cam.shape: (1, 224, 224)
Cam.max: 0.9999998807907104, Cam.min: 0.0
Here you can see the computed CAM values range from [0, 1]. Some image enhancement methods that handle long-tail data multiply the CAM values with the original image to extract either the main subject or the background (context).
Visualization
from pytorch_grad_cam.utils.image import show_cam_on_image
import uuid
import numpy as np
import torch

def vis_cam(cam: np.ndarray, input_tensor: torch.Tensor):
    def normalization(x: np.ndarray, scale=1):   # Normalization
        x_min = np.min(x)
        x_max = np.max(x)
        return (x - x_min) / (x_max - x_min) * scale

    # Underlying implementation is cv2 so it requires image shape as H x W x C
    input_tensor= input_tensor.permute(1, 2, 0).numpy()
    norm_img = normalization(input_tensor)

    # Visualization does not support batch, so we take the first cam
    vis = show_cam_on_image(norm_img, cam[0], use_rgb=True)

    vis_img = Image.fromarray(vis)
    vis_img.save(f'cam_{uuid.uuid1()}.jpg')
    return vis


vis1 = vis_cam(cam, img_tensor)
The result is shown below. Since the image has been preprocessed, the size becomes 224x224, and so is the size of the CAM.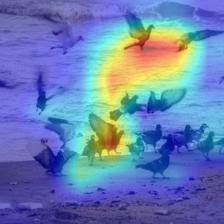
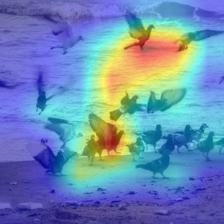
Additionally, this library also provides other CAM methods like GradCAMElementWise, similar to Grad-CAM, where activation values are multiplied element-wise with gradients before applying a ReLU operation. However, after simple use, there is no visible difference:
from pytorch_grad_cam import GradCAMElementWise
grad_cam = GradCAMElementWise(model=model, target_layers=[model.layer4[-1]])
cam = grad_cam(input_tensor=img_tensor.unsqueeze(0)) # Input Shape: B x C x H x W

vis2 = vis_cam(cam, img_tensor)
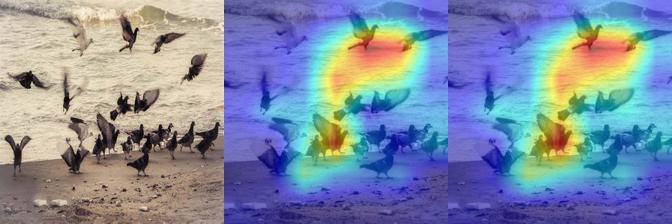
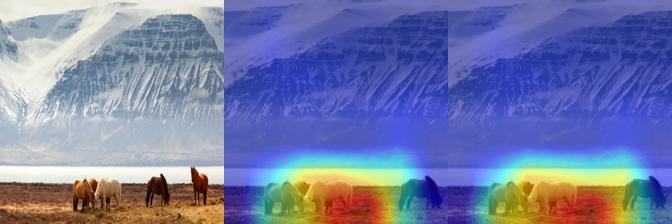
Comparing them side by side, from left to right, are the original image, GradCAM, GradCAMElementWise
img_hstack = np.hstack([img.resize(size=(224, 224)), vis1, vis2])

Image.fromarray((img_hstack).astype(np.uint8)).save('cam_compare.jpg')

Other Considerations
An important aspect not used in this article is the use of ClassifierOutputTarget in the documentation:
cam = GradCAM(model=model, target_layers=target_layers, use_cuda=args.use_cuda)

targets = [ClassifierOutputTarget(281)]


grayscale_cam = cam(input_tensor=input_tensor,
The input parameter is the image corresponding to the target, i.e., the index of 1 in the one-hot label. Since a pre-trained model is used, the specific label is unknown. When targets=None for CAM, it automatically selects the highest scoring class.
There are many features of Grad-CAM not covered here, this article only introduces the calculation of CAM and its visualization.
Runtime Environment
grad-cam: 1.5.0 (pypi)
pytorch: 2.2.2 (py3.12_cuda12.1_cudnn8_0, pytorch)